Starting a new hobby is always exhilarating. Everything is pristine and unexplored for you, and there are a plethora of shiny and colorful things to
spend your hard-earned money on. You make seemingly valid arguments to your subconscious as to why you need the best
this
and the fastest
that
when you know damn well that the basic package is more than enough to get you started. You have expendable income, being a white Magic player and all (thanks Geordie), so why not treat yourself, right?
I’m guilty. I go in with both feet first, finances to the wind. I want to be the envy of my social network, and you do, too. You may not realize it, but when your friend introduced you to Magic and passed you a few hand-me-down cards, how long was it before you were at the shop clamoring over the counter with a fistful of cash? Exactly… and I’m like this about everything I do. I wouldn’t dare be seen with a no-name soda; it has to be Coke. Shoes from Wal-Mart? You must be joking; I paid a solid $100.00 for these Adidas. Sony MP3 player or iPod Touch? That’s a tough one.
When I discovered Warhammer 40K, I repeated the pattern. Great big army, twenty pots of paint, a bunch of brushes, spray cans of base coat in both black and white, and for what? I never called the troops into battle, not once. Sure I had a blast painting maybe fifteen or so miniatures, but then it fell to the wayside like so many hobbies I had dabbled in before, with my wallet the casualty. Sure, it didn’t hurt much back then, when my responsibilities were sparse and bills non-existent. It’s amazing how drastically things can change.
Before we begin filling up your toolbox, I want you to understand that filling this toolbox with the best implements money can buy won’t increase your skill level. Unfortunately, there’s no Jace, the Mind Sculptor in altering. Now that we’ve lost Pat Chapin, let’s go shopping!
If you’re like me and want to obtain everything required in just a single stop, Wal-Mart is not the correct destination this time. I know, crazy right? Instead, we need to head to a craft store. If you’re unsure of where to find one, simply go upstairs and ask your mom. Alternatively, you could phone Grandma seeing as you haven’t talked to her in a month, and she’ll definitely know.
The place I go to is called
Michael’s,
and they’re pretty common throughout Canada and the US. Michael’s is amazing; they have absolutely everything you need at a fair price. The main reason I shop there, though, is that I signed up for their e-mail group, and they keep sending me printable coupons for like 40% off a single purchase! Not only that, but whenever I go through the checkout, they hand me my receipt and a coupon to use next time for 40% off. Let me just say that 40% is a very big number, and when you’re in the market for a set of paints to start with, the kits are a great deal but still a little expensive, so the discount goes a long way.
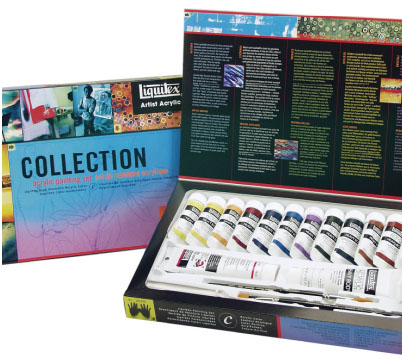
The set I bought about a month ago was this Liquitex one, and I’m sure it was somewhere in the $80.00 range retail. After my 40% discount, I was in the $50.00 range which is pretty sweet considering it has two brushes in the kit! I’m sure there are higher quality paint brands out there and probably some lower quality ones, too, but I’ve never had a problem with the paints that I’ve used. As I’ve mentioned, I started with Games Workshop paints, and I still use them to this day.
Starter kits generally have anywhere from six to twenty colors. Obviously, buy what you can afford, keeping in mind that some of the best card alterers I’ve seen get by with primaries (red, yellow, and blue), white, and black. Although this is the truly artsy way to go, I prefer spending less time mixing colors, so I have a pretty diverse collection allowing me to create the color I need quickly or sometimes using just the color straight out of the pot / tube. Using a stock color doesn’t happen often though, so accurate color-mixing is the key to a successful alter.
When you’re shopping for your paint set, make sure it’s acrylic. Acrylic is nice to work with as it dilutes well, mixes well, the colors are vibrant, and it dries quickly. Altering in other types of paint (e.g. oils) would hardly be practical as we need to keep the thickness of the card as close to original as possible. Having beautiful alters that you have no chance of fitting into a sleeve is hardly desirable. Also, the first thing that judges do when presented with alters for inspection is to de-sleeve them and study the card thickness to determine if it would be easy to locate when shuffling. From here on out, when I’m speaking of paint, I’ll be referring to acrylics unless otherwise specified.
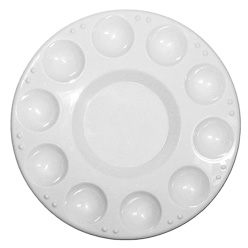
I mentioned mixing being paramount to a good alter, and I’ll expand on this down the road, but for now we’ll stick to filling up the toolbox, and we need something to mix in. I use one of these cheap plastic white trays for all my mixing. They only cost about $3.00 and are infinitely reusable when periodically cleaned.
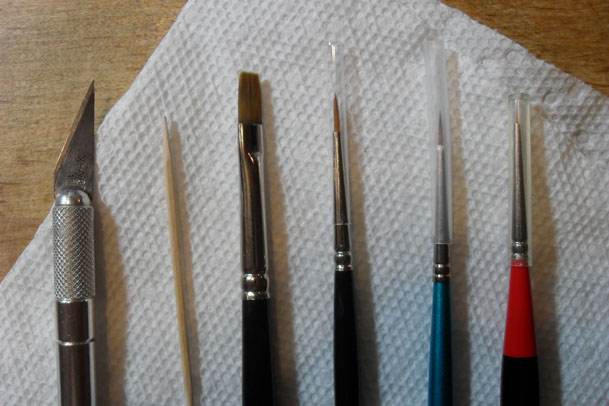
Like the mixing palette, brushes are also quite easy to shop for, albeit a little more expensive. To begin with, you really only need two brushes, three tops. The brush I use for base coating is flat and about as wide as the border of the card. For all my detail work, I use a mixture of smaller brushes, some of them very, very tiny for fine details, but the one I use the most has a fine point but a fair amount of hair to it so it can hold some paint. There will be a picture of some of my brushes further down for reference.
Some of the high-end brushes can get pricey, but we don’t really need the high quality stuff. I find they last just as long as the cheap ones, and all qualities are available in the full range of sizes. I’m not really a fan of spending over $10.00 on a tiny little paintbrush, so I usually look for brushes in the $5.00 range. A brush will typically last me a couple months before it starts to fray and become unable to form a fine point, so whichever brand / quality you go with, it’s really not a big investment in the long run. As far as brushes go, I’d recommend trying different ones until you find something that you’re happy with.
With brushes out of the way, we’ve pretty much covered the basic toolbox. I’d like to briefly cover a few bonus items though; things that aren’t essential but that I use to make life easier and to get a better finished product.
After spending all that time altering, it would be an absolute travesty to have something happen to the painted surface of the card. To dodge this bullet, I use a
Krylon acrylic sealer
when I’m totally finished with the card. The sealer wasn’t part of my initial setup, but I added it to my toolbox after about five alters. This just seals the surface of the card and makes it much more durable.
Although storing all my gear in a lidless tote for a year worked out alright, I recently splurged (if you can call $30.00 minus the 40% discount splurging) on a proper art bin. This was ++EV. It has a handle, so I can bring it with me to the shop for when I have downtime, and it can hold absolutely everything I use… except the OttLite.
After painting in normal household lighting for so long, it was a real wake-up call when my mother let me borrow her
OttLite.
This baby basically creates natural sunlight sitting right there on your desk! It’s amazing the difference this makes when compared to a normal, incandescent light bulb. Again, this is definitely something that you’d only purchase once you go hardcore, as these lights can run upwards of $200 depending on the model. Luckily, mom has two, and I scored big time.
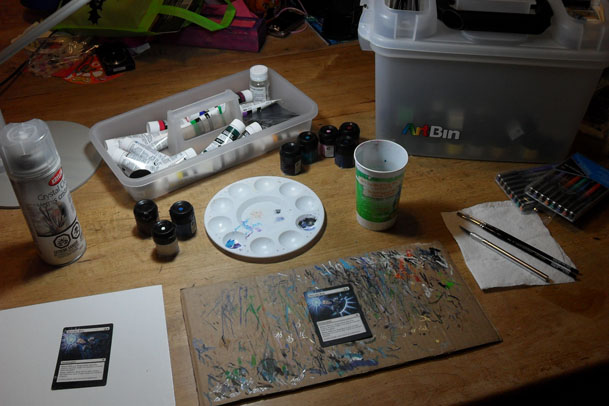
Where surface is concerned, many people will just lay out a sheet of newspaper. I find newspaper terribly distracting, and the print always wears off on my hands, which could in turn end up on my paint job. I always paint on a piece of cardboard that I just hack off of some box in the recycling. It’s a flat surface, it’s clean, and there’s no printing on the one side. I also have a nice sheet of clean white cardboard that serves as a nice backdrop for when I’m taking the progress photos, which I’ve gotten much better at taking I might add. I’d love to be able to take my progress pics for you guys outside during daylight, but with three kids to deal with, the painting generally happens after 8:30.
Toothpicks, X-acto knife, paper towel, and an old cup or jar; the last items for your toolbox. The toothpicks and X-acto knife are for scratching off paint that you managed to slop onto text boxes and whatnot. A toothpick will take off most paint, but some pigments and heavy body paints will sometimes leave a stain behind; this is when the knife comes in. Only use the knife if the toothpick doesn’t work, and if you’re comfortable being very, very light with it. A little extra pressure can put you right through your canvas. The cup will be used to hold water. You definitely need clean water for both thinning paints and cleaning brushes. Don’t worry about adding any kind of solution to the water; it’ll work on its own. Use the paper towel to dry your brush after washing of course.
I think I covered everything of import regarding my toolbox. Pictured below is my work area, and yes, this is simply my kitchen table. Once the kids are in bed, I just push all their junk to the other side of the table and spread out. It never looks this neat, obviously staged for your viewing pleasure.
As promised, here’s a close up of the knife and some brushes with the toothpick thrown in there to give you a sense of scale.
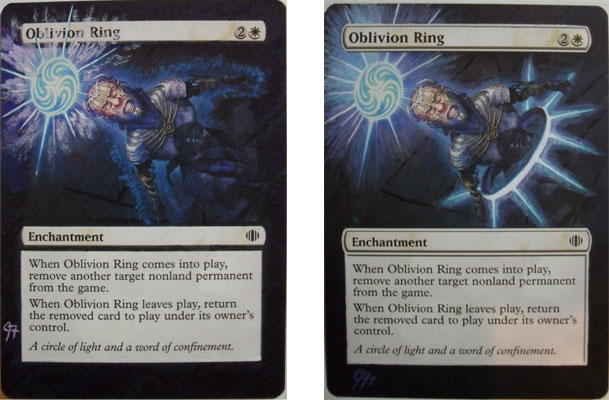
Now that you have your shopping list together, I’d like to delve into this week’s alter. Oblivion Ring is one of my all time favorite cards, and my friends can all attest to the fact that if the O-Ring is legal in whatever format we’re playing, they’ll assume I have it in my hand. The Shards of Alara Oblivion Ring was the first alter I ever did, and the only piece that I’ll most likely never trade. The articles I’ve written so far about this hobby have all been beginner-centric and have unlocked memories of my first few times plying my trade. What better way to gauge my progress over the last couple years than to simply do another Oblivion Ring?
I’m going to just buzz through the new O-Ring here in a condensed version and let the pictures do the talking this time. I know many of you were looking for a more in-depth process analysis, but I felt that covering the tools would cater to a wider audience at this stage.
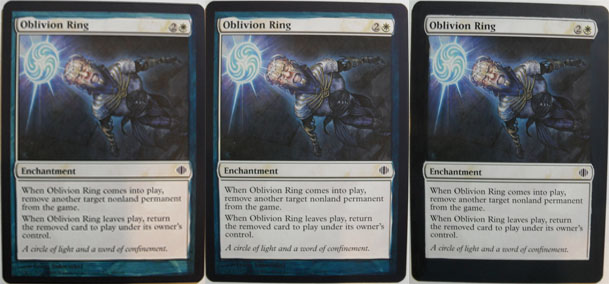
This is the base coating process broken down a little bit. You’ll notice that it takes several coats to remove the border; this is to be expected as you’ll be adding water to your black paint to make it a little thinner.
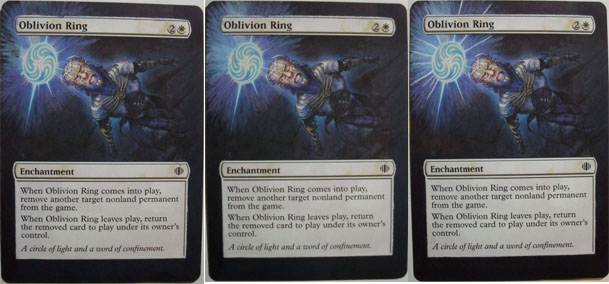
In these steps, I worked on the flooring a little bit and focused on making the ring above his head a little more interesting. After getting to this point on Monday night, I was happy but not excited. Completing the basic alter to the same extent as my original just didn’t seem to cut it for the purposes of gauging my progress. I decided to take it one step further on Tuesday night:
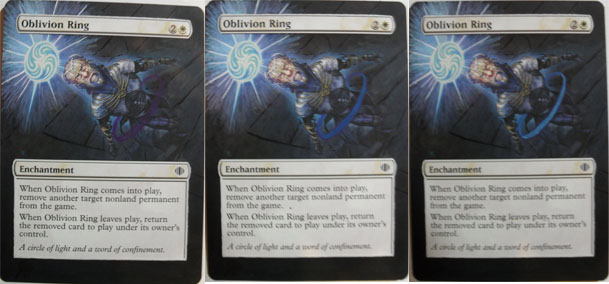
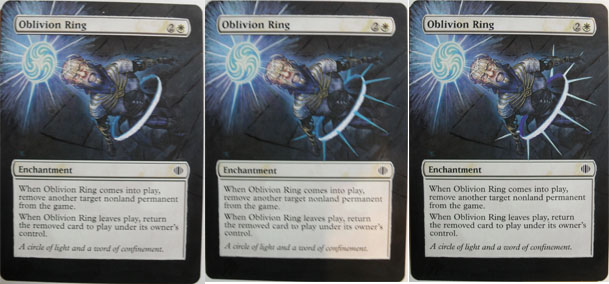
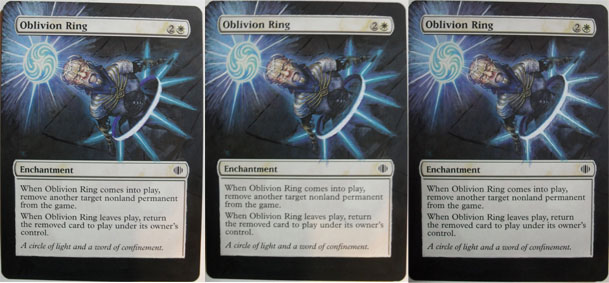
There we go; that looks much better. The orientation of a couple of the white glowy lines still bugs me a little bit, but overall I think it’s a definite improvement over the original. Here’s a comparison from old to new:
Thanks for reading and as always, feel free to hit me up on Twitter
@jerfroggatt
or post in the accompanying forums which I’ll likely be trolling while at work this week!
Cheers,
Jeremy Froggatt