For those of you who plumb my articles for images, deeming the assortment of words trite, I’ll speed up your content pillaging today by reversing
the format.
Before the last review, I shared my commission from Josh Rayden, which was one of a playset of Force of Will. Due to the nature of this article,
I’m going to skip the play by play and briefly discuss each of the remaining three alters in that project before getting to the meat.
If you recall from my previous article, I had worked
Josh’s name into the Jace runes that our angry tribal man was casting to personalize the card for him. It didn’t take long for me to come
up with the idea for the second card, having discussed his last name in our initial e-mail contact. Rayden, how cool would it be to have that as your
last name, right? So I set about doctoring his next Force of Will to look like the Mortal Kombat character, Raiden.
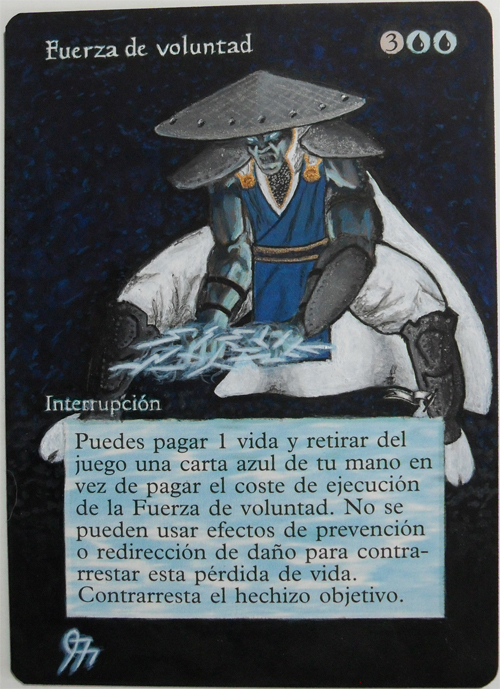
This represented my first attempt at a game/comic character, and I was quite happy with it. Utilizing his initial pose was a bit of a trick, but it
came together nicely over a few evenings.
The third alter I did in this set came to me while I was already halfway through the piece. I began the third and fourth cards together actually, base
coating black and changing all highlighting on the main character to blue.
I’d like to mention that for the remaining two Forces, I took a different approach to the lettering while base coating. I was having a rough time
getting the paint to come off the lettering in the first two alters, even using my X-ACTO knife, so I did the remaining ones without any paint removal.
For those of you who have yet to attempt an older framed card, let me just say that painting around the lettering neatly without covering any is quite
the feat. This was probably one of my most satisfying achievements I’ve experienced since I began altering!
I settled on the Daze theme while flicking through my Legacy Merfolk deck for ideas. Alterists have been known to combine deck-relevant cards in a
commission, such as the popular Sensei’s Divining Top with flaming Counterbalance colors that has been produced by many different artists.
Putting Merfolk randomly on a Force just didn’t seem right, so I settled on Daze.
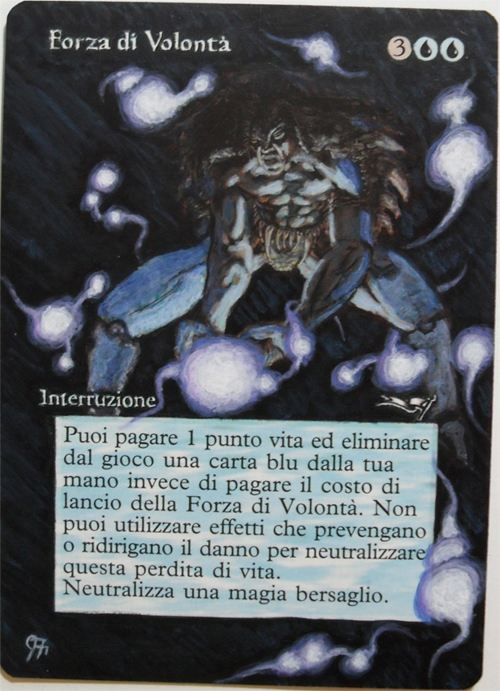
The Daze was probably my favorite of the set despite having many areas I’m not happy with. When holding the card, the bubbles really pop from the
card, making it really attractive.
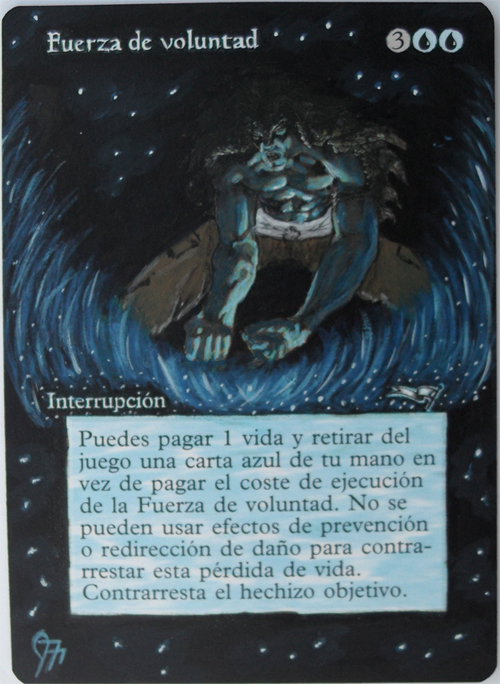
The final piece of the set was completed with a blue flame feeling in mind. Essentially, I wanted to take the idea behind the original image,
but just transform it to being blue. Of course, after coming up with the idea, I wished I could Rewind and convert the original red flames to blue, but
I had already base coated it with the previous card.
I liked the idea of the fire coming up around him as the original did, so I made it grow and spread as it got farther from his central casting
point. There were about eight different shades of blue to complete this, but after the basing and character converting was done, the fire portion was
easy.
Now let’s get to the tips!
Clean your card
It’s not something you would generally think about prior to sitting down for an art session, as typical artistry is done on a nice, clean blank
canvas. It would be great if every card was kept in mint condition throughout the years, never leaving its snug, little sleeve, but in most cases, the
card you’re about to paint on has passed through a few hands over the years. Now, it’s typically not on the same grime level as that of
pocket change, but some of the older cardboard in circulation comes close. Everyone has seen an older card with dirty little spots present that you can
usually scrape off with your fingernail.
Whether the grime is visible or not, there will be some amount of finger grease on them from being handled anyway, so I will almost always do a quick
cleaning on the card before I dip a brush. This doesn’t entail any actual work generally, as I’ll just get a piece of paper towel, dampen
it a tad and then give the card’s surface a good scrub so I have a nice clean canvas to work on. It is very important that you do not use toilet
paper or Kleenex to do this, however. Those are much too flimsy to actually remove stuck dirt, and can also leave behind little white fluff that
you’ll get in your paint later.
Water, water, water
Every first alter has one thing in common: the paint is too thick. When people post their first alter in the MTGS forums, you will always see sections
that remind you of that girl in high school with the tanning booth orange skin who doesn’t know when to stop applying makeup. It’s caked on
and streaky. Acrylic paint comes in two basic forms: heavy body and soft body. The soft body paints are much easier to work with when it comes to
obtaining a desirable consistency, while the heavy body paint has a thick, almost buttery consistency out of the bottle. Heavy body definitely requires
a greater amount of added water to result in a smooth paint suitable for working on our tiny canvasses, making the soft body better if you’re
just starting out.
Regardless of which type of paint you employ, adding a drop of water is generally necessary. The method that seems to work for me is to wash my brush
between colors, dry it off on a paper towel, then dip it slightly back into the water, about a third of the way up the bristles. You don’t want
to load the brush with water, or you’ll just end up turning your paint into water. Then, I’ll pull the paint on my palette around with the
brush until I’m happy with the mixture. Note: It is paramount that you change your water frequently to keep it clean, or you’ll end up with
tainted/dirty paint, yuck!
Stroke it first
During my first few months of altering, before I was adding water to my paints, I would always get frustrated when I accidentally globbed on a bit too
much paint in an area. After dipping my brush back into paint, I would go straight to the card and create a situation where I’d have to try to undo
what I’d just done.
Even if I’ve used a bunch of water and am sure that the consistency is where it should be, I’ll still run a quick stroke on the cardboard surface I do
my painting on to be sure. Sometimes your paint will have a little clump in it that you didn’t see, a piece of hair that has abandoned ship, or more
likely, just too heavy a load.
With this canvas size, it’s imperative that we make all of our strokes count, as we’re generally working with very fine and detailed lines. It’s very
hard, well maybe not hard, but certainly time consuming, to repair a detailed section because you had too much paint on your brush.
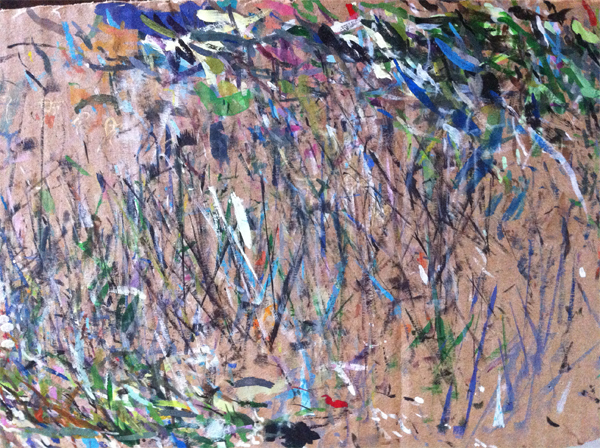
In summary: if your painting surface doesn’t look like this, then you’re doing it wrong.
Base coating
I’ve touched on the two approaches of card preparation in previous articles, but I’ll do so again here as this will hopefully be a good reference piece
down the road for budding alterists.
The most widely adopted form of prepping your card is base coating. Essentially, your aim is to lay down layers of paint, covering up the original
artwork or borders that you intend to paint over. The color you use to basecoat is up to you; though when working with acrylics, you’ll find that most
colors are so translucent that you could still be base coating an hour later. Many artists simply use a couple layers of grey before getting into color
matching the art. Personally, I like to mix my own base color.
I like seeing progression as I work, so if the sky needs to end up blue, then why not use some blue in the base coating process? This just makes it
easier for me to visualize where I’m going with a piece. So, I’ll find the closest stock color I have to my desired outcome, then add a bit of a shade
(black/grey/white) to give the color the opacity it needs to cover up the card in just two or three coats.
As discussed back in the water section, it is very important that these layers are thin and even, as a slight texturization in the basecoat step will
be near impossible to cover up, leading to the dreaded do-over.
The other, less used approach to preparing your card for pimpage is by way of erasure. This is where you use an eraser to take all the printed color
off the card until you’re down to a nice clean white canvas.
I used this method at the beginning, but you put a lot of elbow grease into each card; it can chew through erasers pretty quickly; and it makes much
more mess. That’s not to say this method is without merit, but I’ve just found more enjoyment pushing paint around the card.
Slow and steady
Something we’ve all heard at some point in our lives is that “slow and steady wins the race,” and that certainly applies to this
hobby. Take a quick trip to eBay and Google “mtg alters” or “altered mtg,” and you’ll be amazed at the buffoonery
infesting the auctions. I’ve pointed this out previously and even did an alter in roughly ten minutes to illustrate my point.
I fully understand that people are new to the hobby, or new to art altogether, as that’s where I began only a few short years ago. I did,
however, take my time and attempt to really work on something I could be proud of; even out of the gate. One of the sayings/lessons that has truly
stuck with me from my childhood is: “do it right the first time, or don’t do it at all.” And I’ve begun hammering that into my
children’s noggins as my father did for me.
While you’re working on an alter, making decent progression in one area is exciting, and it makes you work faster. It’s like drawing your
opener in game three of a match and the tournament caller announces there is ten minutes left in the round. Adrenaline’s pumping, and you start
playing faster: “Land, go,” “Land, Rampant Growth, go,” “OMG, I had Lotus Cobra in my hand…”
Misplays happen in Magic and in alterations. Luckily, we’re able to fix our mistakes, though it does take longer to fix a painting error than it
would to simply work at a slower speed in the first place.
Let it dry
This is a quick and easy tidbit, but actually following through with it is more difficult than you think.
When you’re working on a specific color or area, it’s easy to get rolling along and neglect drying time. Sure, acrylics are notoriously
fast dryers, but when you have the colors mixed and ready, you can be ahead of the paint. The most common issue I’ve found is that when I start
applying a bit of paint to an area I’ve just been working on, it will actually pull the first paint off the card. This leaves an area now that
doesn’t match the layering of the paint around it, making it time consuming to repair before being able to carry on.
If you find you’re a quick painter, then start doing two or even four of the same card at a time. Even by flipping between two of the same card,
you’ll be granted the necessary drying time to be able to carry on at a quicker pace. There is always the option of simply blowing on your paint
until it dries of course, which may take ten seconds.
The toothpick
The most magical of our tools, the toothpick is essentially an alterist’s eraser. Having good strong toothpicks on hand is essential, unless you never
make mistakes, which I’ll wager is almost impossible. No matter how steady your hand is, you will end up with paint in unintended places. Once
the paint is dry, the toothpick will be able to remove any excess paint with relative ease. Sometimes, I’m still unable to get the paint off the
card, with certain colors being more difficult than others. If you run into this, what I’ve used to great effect is an X-ACTO knife instead of
the toothpick. Keep in mind that the knife is very sharp, and you can end up scratching through the surface of the card resulting in a larger repair
job than you’d like, so be very careful with this method.
Recently, Marshall (@MarshallLRCast) from the Limited Resources podcast has begun altering, and improving in great strides. One thing that he mentioned
was that if you dampen your toothpick a little before having a go at the paint, it is easier to remove. I have yet to try this, but it’s
something to bear in mind.
Sleep on it
This is one of the most important tips I could share with you. It’s something that is applicable to many facets of life from art to
relationships, writing to big decision making. Once you feel like you’ve finished the alter to the point where you’re ready to seal it with
your spray, put it aside and go to bed. After a good night’s rest, come back and look at the work you’ve done and assess if there is anything
you’d change.
Countless times, I’ve finished an alter, gone to bed, and then came back to have a look at it in the morning to find that there are a couple
places I neglected to clean up with the toothpick, or maybe a couple strokes needed to finish something small off. A few times, I’ve even come
back to it and added a completely different element to the card resulting in another hour of work or so. I feel that this step is vital to getting the
best out of yourself, so don’t skip it!
Mock up non-extensions
Generally, I focus my altering on art extensions, so I don’t have a lot of experience in this area. What I do know is that before painting cards
with a significant value, pretty much everyone sketches something out first. Even when I did my Force of Will set, I scribbled a few things on paper,
like the layout of the runes to spell Josh, and the direction of Raiden’s hat, etc.
Diving into the card with a paintbrush when you’re doing something original seems like a bad idea. If you decide to change directions, or would
prefer the pose of a character just a little differently, you’ll have two options remaining: paint on more layers, making the card thicker, or
scratching off the paint and attempting to redo the area altogether.
Those lovely superhero alters we see are done by resizing a picture to the correct proportions, then transposing that onto the card. To attempt to wing it would be folly.
Stay positive!
All too often I read comments in the forums by newer alterists stating that they suck at this, and asking how they can get better. This hobby is like
anything in life; you need to stick to it and practice. So your first card didn’t turn out all that fantastic; did you expect a masterpiece? When
I started out, my stuff was okay, but nothing to write home about either. You need to enjoy doing it. If you’re attempting this hobby to make
money, you might as well put the supplies away. Sure there are some successful artists out there doing this as a full-time job, but they are few and
far between. You need to love it, and do it because you love it. You need to be positive about altering. Positive about sharing something with the
community. Positive about yourself.
Recently, a young lady sent me a message on Twitter asking me all sorts of questions about the hobby, and I answered to the best of my ability. (This
is when I decided to take this article from my ideas document and actually write it.) A few days later, I received a request for critique with
this picture in my inbox:
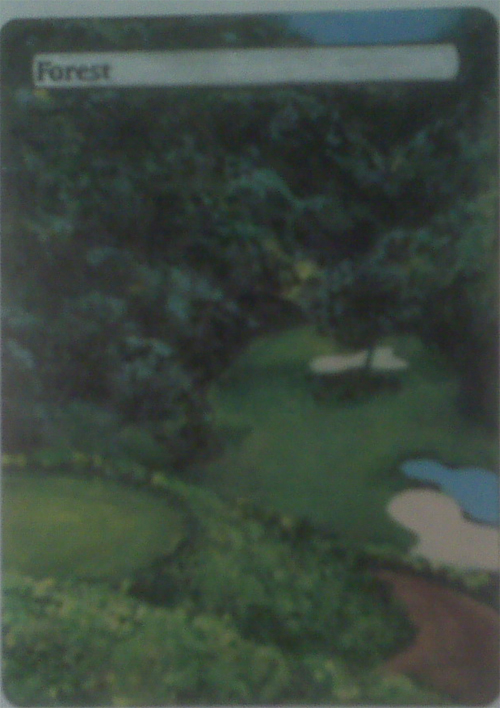
I told Lorena my honest opinion, which (besides the poor photo) was all positive. The idea of tying in golf to some alters was something I’d
never seen done before, though I’m sure there are a contingent of us out there that would appreciate this sort of thing. The perspective is
refreshing, and the details in the foliage are fantastic. A brilliant first attempt, I’m sure you’d all agree.
Then I received a response to my critique, which has probably been the most gratifying thing I’ve experienced since I began all of this.
Here’s an excerpt:
“…later in the day I came to the conclusion that I just wasn’t cut out for it. But out of nowhere, I got the idea of contacting you to ask a
few questions. I’m so glad I did. You’ve given me the boost I need to believe in myself. Sounds cheesy, but true. You’re awesome! A thousand thank
you’s!”
Sorry if that’s sharing too much with the world, Lorena, but I couldn’t help it!
Well, hopefully I’ve covered enough angles in this hobby to get you off the ground, but should you need anything else, feel free to contact me
anytime.
Twitter: @Jerfroggatt
E-mail: Jfroggatt at persona dot ca
Webite: www.mtgalters.com