“Golgari is by far the weakest guild.”
“Whoever drafts Golgari will have fun watching Day 2 coverage.”
“You like Golgari? Why do you do this to yourself?”
This is what people told me the night before the Pro Tour. Almost everyone I talked to hated Golgari and had results to back it up. Perhaps I’d lost my touch—or maybe very few people actually understood how to draft it. After all, it isn’t the easiest guild to figure out.
I ended up drafting Golgari and winning my first draft.
Golgari is a very difficult guild to draft. Many of the commons look weak in comparison to the other guild’s. The best cards get taken by the Rakdos and Selesnya drafters, leaving a bunch of average cards to pick from. Sure, there are a handful of playable cards in each pack to choose, but the individual power level just isn’t there. The trick is to find out the correct way to prioritize the spells. To understand this properly we must first know what the strengths and weaknesses are to the archetype.
Strengths
Scavenge allows decks to effectively split up the power of its spells. The non-rare scavenge creatures tend to have very weak bodies for their cost but make it up with the added ability of being able to pump up the living from beyond the grave. This provides a steady stream of decently sized monsters in the later stages of a game. You just have to stay alive to get there.
Weaknesses
The weakness to this strategy also stems from the scavenge ability. The scavenge cards tend to be much smaller in the early stages of the game. Every other guild has built-in protection against the average Golgari creature—higher toughness, higher power. Rakdos has much more aggressive creatures and can easily attack through the small toughness guys. Azorius and Izzet both have high toughness guys that can simply brick wall any small beaters. Four power is the magic number, but there isn’t enough time or resources to scavenge in the early turns of a game. There isn’t even good, cheap removal for Golgari decks to get past high toughness creatures. Golgari is simply at a disadvantage.
There are two very unique ways to draft Golgari. The fact that these decks are very different from one another makes the cards you want in each version completely unique. Outside of the obvious bombs in the colors, these two decks have very little overlap.
Drafting the Green Machine
On one side, we have a very aggressive deck. On the surface if looks like a beatdown strategy, but actually it’s trying to be the last man standing. Scavenge is key. The goal is to have both players in topdeck mode, but the Golgari player has a graveyard littered with card advantage.
Valuable Commons
Daggerdrome Imp
Dead Reveler
Grim Roustabout
Sewer Shambler
Stab Wound
Mind Rot
Drudge Beetle
Stonefare Crocodile
Giant Growth
Aerial Predation
Sluiceway Scorpion
Pump Spells
Giant Growth is the card that brings this entire strategy together. It was dismissed in initial testing because it’s just Giant Growth. The card has never been that good before, so how could it be amazing now?
Think about every weakness Golgari has. Most of the time, the opposing creature will be better in some way, making it hard to attack or block. The board will gradually clutter, opening yourself up to cards like Blustersquall and Teleportal.
Not only do these cards get better, but our opponent’s tempo cards become much more powerful. Scavenge is best used when both players have very few resources available. We’re not really progressing our board state, simply making one guy bigger and hoping nothing bad happens. We don’t want scavenging to backfire, since we used an entire turn to do it.
Pump spells allow us to trade more resources in the early game, reducing the board state. This will make it less detrimental when our opponent has an answer to our scavenged monster.
Giant Growth is also a very good answer to bombs. There aren’t many removal spells in the format, making it important to have some answer to a big, scary monster. Most of them are in the 4-6 toughness range, making it fairly easy to dismantle one if they decide to enter the combat zone.
Grisly Salvage
It’s a mistake to value Grisly Salvage too highly. Grisly Salvage looks good on paper. It finds the most powerful creatures, extra lands, and at the same time scavenge creatures to use later in the game. The only problem with this is it completely derails The Green Machine strategy of making one-for-one trades to attrition out an opponent.
The Golgari drafter must immediately start creating a board presence and interacting with the opponent. Like I said before, the other decks have the advantage, since their creatures are bigger and can start doing damage. The blue decks are also very tempo-oriented and can get an extremely good position if the Golgari player is not careful. This makes casting Grisly Salvage too big of a liability.
The biggest reason why this card is not good in this strategy is The Green Machine is designed around making the weaker scavenge cards good by drafting as many pump spells as possible. This makes cards like Sewer Shambler much more efficient, since it can help trade off creatures with the aid of a Giant Growth.
Keeping an Eye on the Sky
One of the easiest ways to pull ahead in a game is to have a Daggerdrome Imp. Not only is this the card you want to scavenge onto in the late game, but it plays an important role in the early game as well. The ability to drain an opponent for one life a turn can help when whittling down their resources. This little guy also helps protect you from cards like Blustersquall and Teleportal.
The most important job Daggerdrome Imp has is helping you beat Selesnya decks. Selesnya is by far the toughest matchup for The Green Machine because they can assemble a very large army, and many of their spells create more creatures. This makes it very difficult for Giant Growth to be effective, since it is often only trading with half of a card.
However Selesnya has a weakness: very big fliers.
Taking the Draw
This is a very unconventional strategy. The main way Golgari wins is by getting to the late game with a better board presence. It rarely wins when both players have cards in their hand except for when you have access to bomb rares, Korozda Guildmage, Stab Wounds, or multiple Dreg Manglers.
Taking the draw with Mind Rot in the maindeck has worked out very well for me on Magic Online. Keep the curve low with multiple creatures and pump spells with only sixteen lands. This allows for a slightly more spell dense deck that will help out when the games go longer.
Here is an example of The Green Machine.
1 Slum Reaper
1 Mind Rot
1 Golgari Guildgate
1 Dreg Mangler
3 Giant Growth
2 Stonefare Crocodile
1 Savage Surge
1 Dark Revenant
1 Sluiceway Scorpion
1 Brushstrider
2 Sewer Shambler
2 Daggerdrome Imp
1 Grim Roustabout
1 Golgari Decoy
1 Dead Reveler
1 Aerial Predation
1 Stab Wound
1 Korozda Guildmage
1 Drudge Beetle
1 Dryad Militant
7 Swamp
8 Forest
Five-Color Walls
The other side of the spectrum is a deck designed around Axebane Guardian. Instead of a nickel-and-dime strategy, this archetype tries to go over the top with multiple splashes for removal and a few haymakers in the late game. This deck tries to survive until the opponent has drawn too many irrelevant cards and can’t get around an army of four-toughness monsters backed up by removal and scavenge.
Valuable Commons
Ogre Jailbreaker
Perilous Shadow
Launch Party
Stab Wound
Axebane Guardian
Gatecreeper Vine
Rubbleback Rhino
Towering Indrik
Aerial Predation
Sluiceway Scorpion
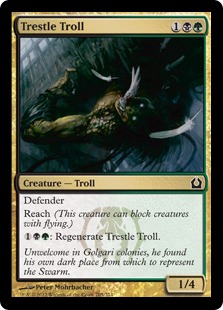
Trestle Troll
Grisly Salvage
Red Alert: Shields Up!
The goals of the 5-Color Wall deck are much different than those of The Green Machine. This deck is trying to assemble as many bodies on the board as possible, but most of them have defender. The reason for this is to help out the Axebane Guardians in the deck. The core of this deck is removal spells and the four major defenders.
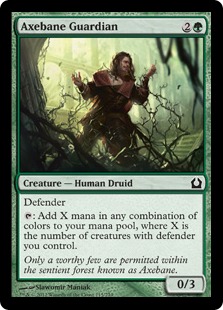
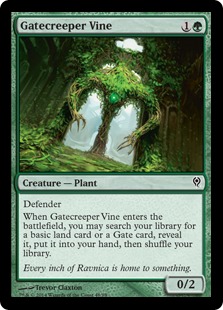
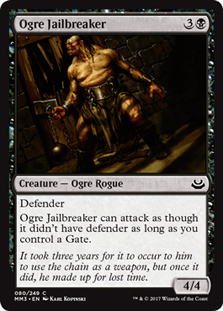
Gatekeeper Vine and Axebane Guardian help accelerate and fix any mana issues the deck may have. Gatekeeper Vine works double duty in this deck. Not only does he help ramp up an Axebane Guardian, but he also finds gates for Ogre Jailbreaker.
It is not very important for the Ogre Jailbreaker to be able to attack in the early turns, but is nice when he can. The reason that this isn’t important is because you’re just trying to weather the storm. Stabilizing the board quickly is a huge priority, making Ogre Jailbreaker and Trestle Troll very good.
Grisly Salvage
Now this is a deck that wants a Grisly Salvage or two. It finds Axebane Guardians, bombs, and lands, while dumping scavenge creatures into the graveyard.
Grisly Salvage’s stock goes up with the addition of every powerful creature. The more powerful your deck is, the more copies of this card you want. The higher the number of Grisly Salvages you have in your deck, the more copies of Treasured Find you want. But you really want a decent number of Axebane Guardians to help smooth out the draws with all the do-nothings.
Don’t Be Afraid to Splash
Players need to go pretty deep with this strategy, so don’t be afraid of more colors. A common mistake is sticking to the base colors too often. You want to branch out as much as possible. You can take mana fixing aggressively while looking for the few cards you really want. Don’t just take a mediocre card because it is on-color. If you don’t know when to take an off-color card, follow these simple guidelines:
- It only has one mana symbol outside of black or green. This means no Annihilating Fires but as many Auger Sprees as you can find. You will often have multiple splashes, so you never want to need access to two colored sources for a spell. Ignore this rule if it is an absolute bomb in the strategy (Archon of the Triumvirate).
- If it can kill a creature, it probably should go in your deck. Creature removal is so important for this strategy. Winning is easy, since you’ll end up playing large monsters regardless of how good they are. Axebane Stag gets the job done just as well as any other creature once it hits play.
Here is an example of Five-Color Walls.
1 Terrus Wurm
1 Explosive Impact
1 Trestle Troll
1 Sluiceway Scorpion
1 Thrill-Kill Assassin
1 Aerial Predation
2 Ogre Jailbreaker
1 Dreg Mangler
1 Towering Indrik
2 Axebane Guardian
2 Gatecreeper Vine
1 Rakdos Ragemutt
2 Grisly Salvage
1 Auger Spree
1 Arrest
1 Korozda Guildmage
1 Jarad’s Orders
1 Assassin’s Strike
1 Launch Party
1 Stab Wound
2 Golgari Guildgate
1 Rakdos Guildgate
8 Forest
4 Swamp
1 Plains
Golgari doesn’t look that good on the surface. You really have to delve deep to truly understand the raw power of the guild. This is what makes me proud to be a part of the Golgari guild. Who’s with me!